프로그램 개발 중 측정 이미지를 4 분할하여 키패드의 키를 누르면 각 분할 화면이 보이도록 하는 요청이 있었다.
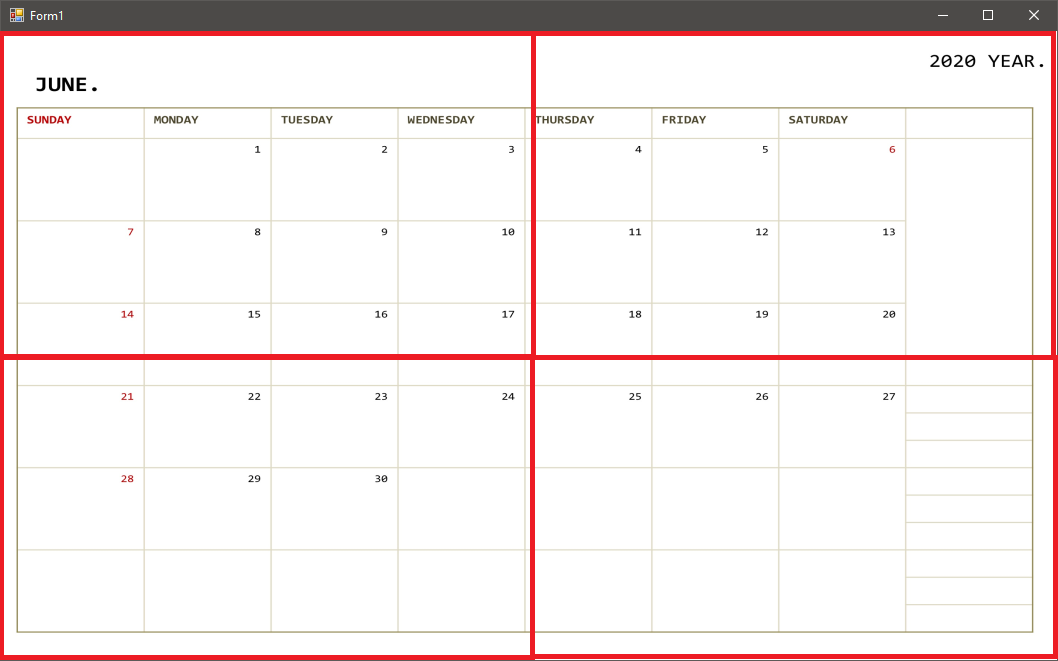
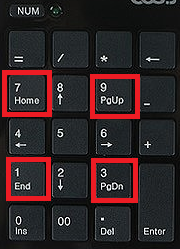
위와 같이 이미지에서 화면을 4 분할하여 키패드의 각 숫자를 누르게 되면 해당하는 화면 분할이 보이도록 하였다.
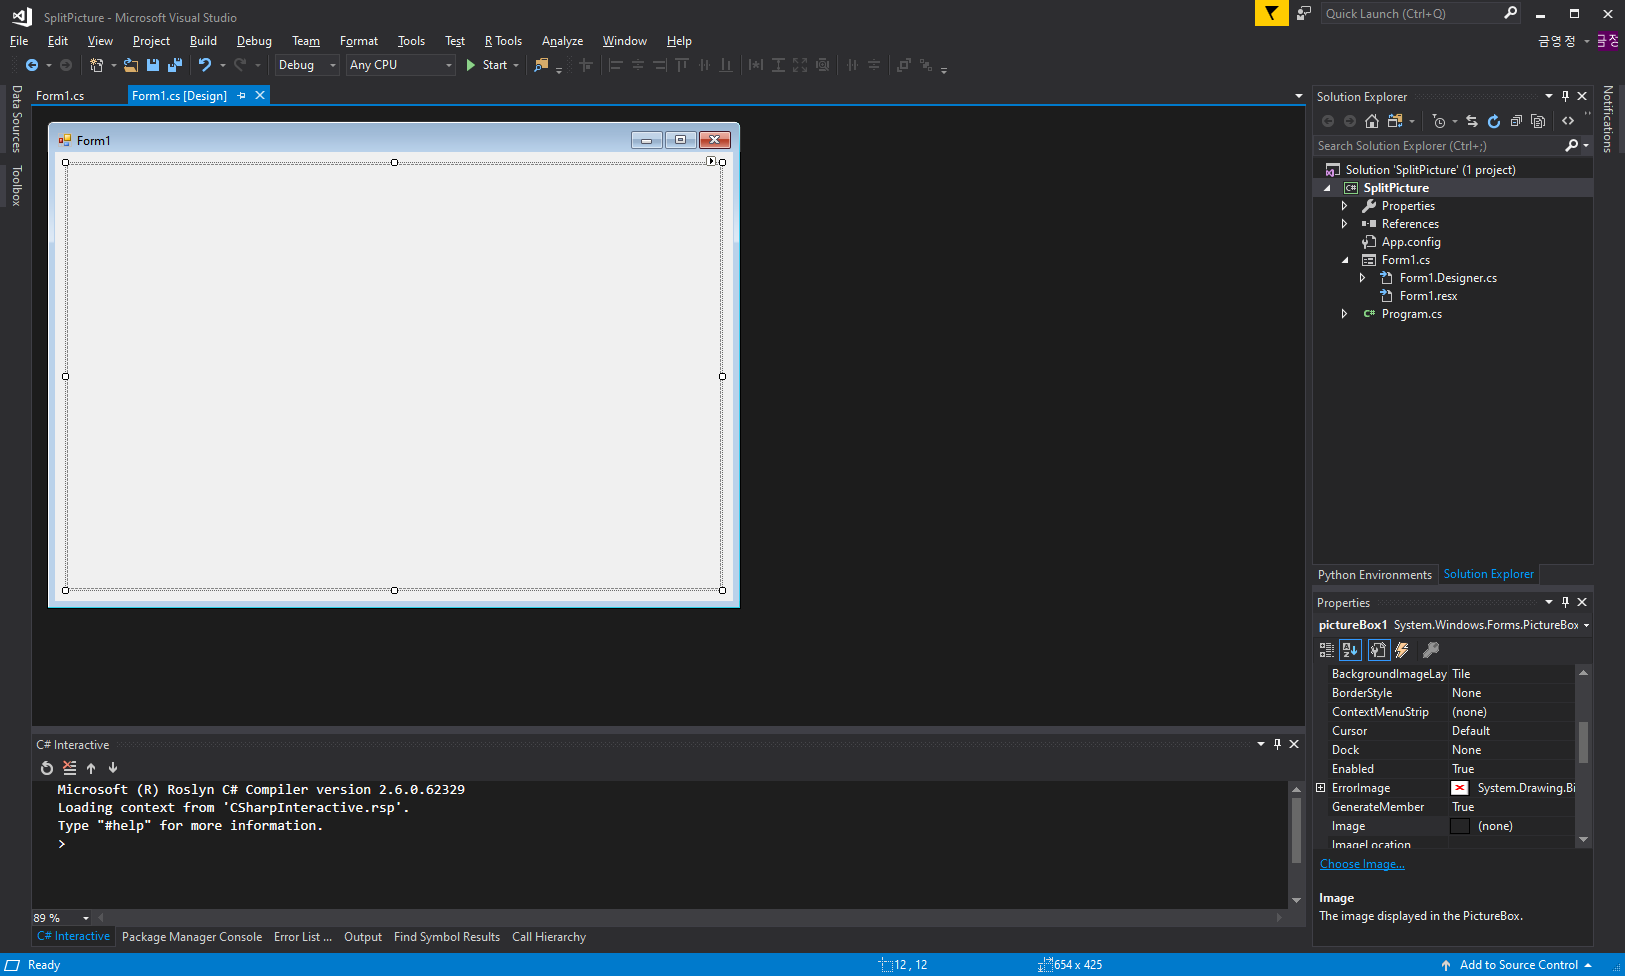
간단하게 Form1에 PicturBox1 하나를 생성해 주고,
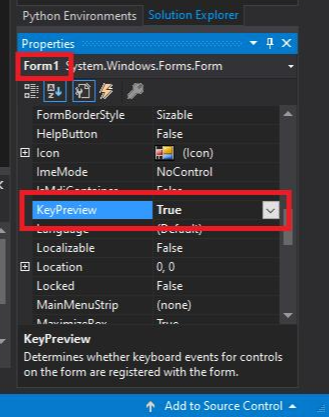
KeyDown 이벤트를 사용하기 위해 Form1 속성에서 KeyPreview 를 True로 변경해준다.
|
1
2
3
4
5
6
7
8
9
10
11
12
13
14
15
16
17
18
19
|
Bitmap bmp;
Form form2;
PictureBox pictureBox2;
private void Form1_Load(object sender, EventArgs e)
{
bmp = new Bitmap(@"E:/2020_Diary_6.jpg");
pictureBox1.BackgroundImage = bmp;
pictureBox1.BackgroundImageLayout = ImageLayout.Stretch;
form2 = new Form();
form2.Width = (int)(pictureBox1.Width / 2 * 1.5);
form2.Height = (int)(pictureBox1.Height / 2 * 1.5);
form2.StartPosition = FormStartPosition.CenterParent;
form2.KeyDown += new KeyEventHandler(Form_KeyDown);
pictureBox2 = new PictureBox();
pictureBox2.Dock = DockStyle.Fill;
pictureBox2.BackgroundImageLayout = ImageLayout.Stretch;
}
|
cs |
키 입력에 따른 화면 분할 창을 새로 띄우기 위해서 Form과 PictureBox를 전역변수로 선언해 두고,
Form1_Load 함수에서 각 Image 설정값을 지정해 준다.
샘플 이미지로는 새로 만들어놓은 달력 이미지를 사용했다 : )
각 ImageLayout은 Stretch로 설정하여 PicturBox에 딱 맞게 출력되도록 했다.
form2의 사이즈와 StartPosition 등도 설정해줬고,
form2.KeyDown += New KeyEventHandler(Form_KeyDown);
위줄은 화면 분할 창이 떴을 때, 이미지를 확인하고 Enter키를 이용하여 창을 닫기 위해
추가로 KeyDown 이벤트를 등록해 준 것이다.
기본 설정을 위와 같이 해주고 본격적으로 KeyDown 이벤트를 생성해보자.
|
1
2
3
4
5
6
7
8
9
10
11
12
13
14
15
16
17
18
19
20
21
22
23
24
25
26
27
28
29
30
31
32
33
34
35
36
37
38
39
40
41
42
43
44
45
46
47
48
49
50
51
|
private void Form1_KeyDown(object sender, KeyEventArgs e)
{
if (pictureBox1.BackgroundImage != null)
{
if (e.KeyCode == Keys.NumPad7)
{
Bitmap fullImage = bmp;
fullImage = fullImage.Clone(
new Rectangle(0, 0, fullImage.Width / 2, fullImage.Height / 2),
System.Drawing.Imaging.PixelFormat.DontCare);
pictureBox2.BackgroundImage = fullImage;
form2.Controls.Add(pictureBox2);
form2.ShowDialog();
}
else if (e.KeyCode == Keys.NumPad9)
{
Bitmap fullImage = bmp;
fullImage = fullImage.Clone(
new Rectangle(fullImage.Width / 2, 0, fullImage.Width / 2, fullImage.Height / 2),
System.Drawing.Imaging.PixelFormat.DontCare);
pictureBox2.BackgroundImage = fullImage;
form2.Controls.Add(pictureBox2);
form2.ShowDialog();
}
else if (e.KeyCode == Keys.NumPad1)
{
Bitmap fullImage = bmp;
fullImage = fullImage.Clone(
new Rectangle(0, fullImage.Height / 2, fullImage.Width / 2, fullImage.Height / 2),
System.Drawing.Imaging.PixelFormat.DontCare);
pictureBox2.BackgroundImage = fullImage;
form2.Controls.Add(pictureBox2);
form2.ShowDialog();
}
else if (e.KeyCode == Keys.NumPad3)
{
Bitmap fullImage = bmp;
fullImage = fullImage.Clone(
new Rectangle(fullImage.Width / 2, fullImage.Height / 2, fullImage.Width / 2, fullImage.Height / 2),
System.Drawing.Imaging.PixelFormat.DontCare);
pictureBox2.BackgroundImage = fullImage;
form2.Controls.Add(pictureBox2);
form2.ShowDialog();
}
}
}
private void Form_KeyDown(object sender, KeyEventArgs e)
{
if (e.KeyCode == Keys.Enter) form2.Hide();
}
|
cs |
Form1_KeyDown 이벤트를 생성해주고, 위와 같이 코드를 작성해준다.
아래의 Form_KeyDown 이벤트는 위에서 명시했듯이 Enter 키 입력을 통해 창을 닫는 코드이다.
키 입력이 발생하면 이벤트 함수에서 if문을 통해 어떤 키를 입력받았는지 확인을 한다.
if(e.KeyCode == Keys.NumPad7) 경우는 숫자패드 7번이 입력됐을 때이며,
각각의 이미지를 각 분할 크기대로 잘라서 새로운 form2의 PictureBox2에 뿌려준다.
이미지 자르는 코드는 이전 포스팅을 참고하면 된다.
2018/12/05 - [IT] - [C#] PictureBox 이미지 자르고 적용하기
[C#] PictureBox 이미지 자르고 적용하기
이미지의 특정 부분만 잘라서 사용하도록 만들어보자. 먼저 pictureBox1과 pictureBox2를 만들어주고 이미지 resize를 위해 button1 하나를 생성해 주었다. pictureBox1에는 Size = (450, 450) 의 이미지를 넣고..
ella-devblog.tistory.com
실행 화면은 다음과 같다.
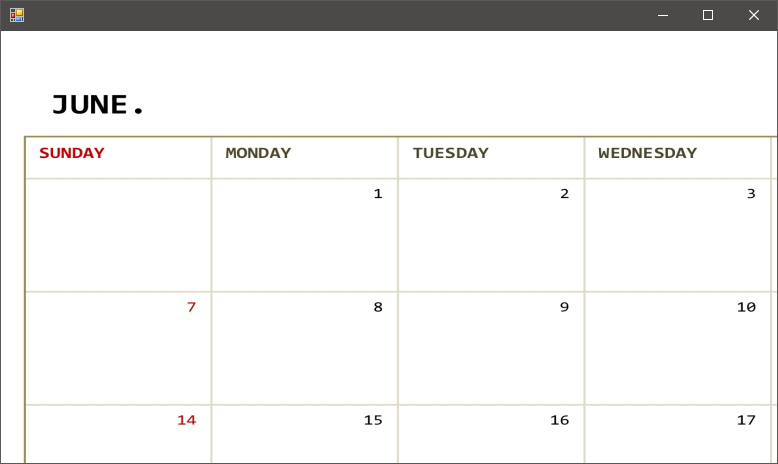
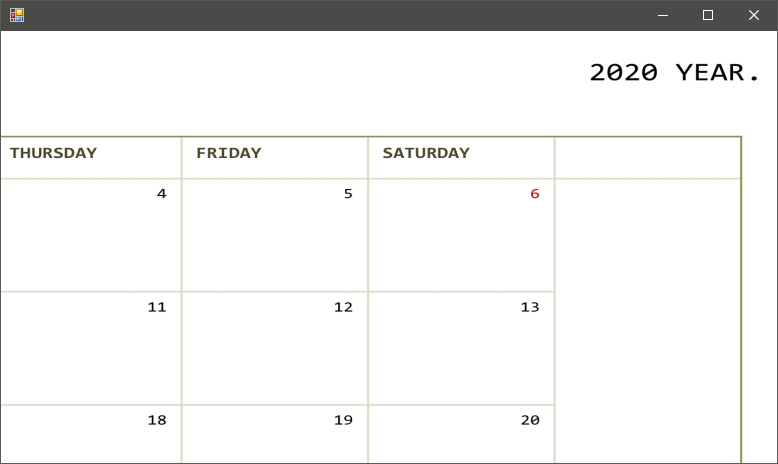
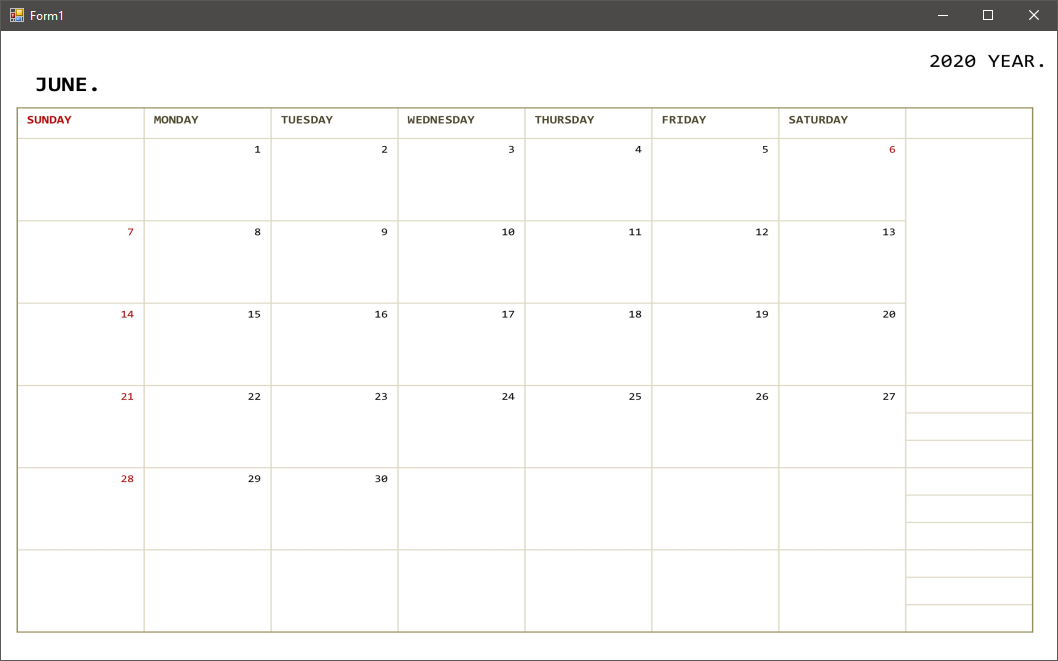
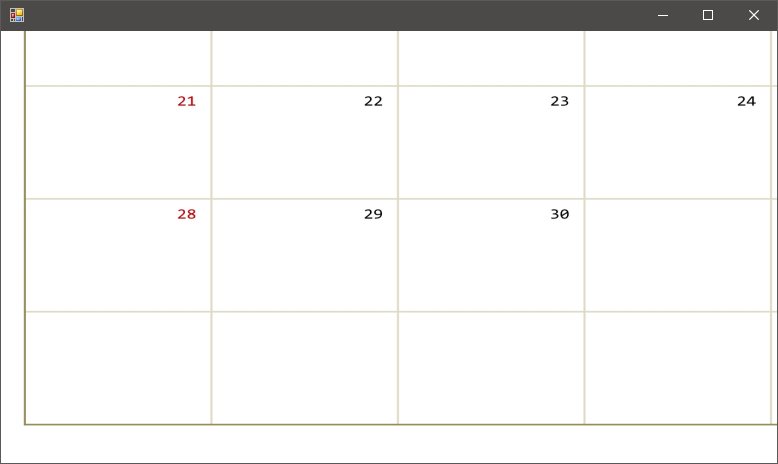

각각의 분할 이미지 화면 창이 뜨면 이미지를 확인하고 Enter키를 누르면 Sub창이 꺼져서
키패드로 조작하기가 굉장히 편리하다.
'IT > C#' 카테고리의 다른 글
| [C#] 가계부 프로그램 만들기 DAY2. 프로그램 UI 생성 및 가계부 기본 설정하기 (11) | 2020.02.29 |
|---|---|
| [C#] 가계부 프로그램 만들기 DAY1. Database 설정 및 연결 (0) | 2020.02.28 |
| [C#] Unsafe Code 사용하기 (pointer 사용하기) (0) | 2019.11.29 |
| [C#] CultureInfo와 Resources File을 사용하여 Multi Language 다국어 지원하기 (2) | 2019.06.05 |
| [C#] Mouse Event를 통해서 Picturebox 포인트 사이 거리 구하기 (2) | 2019.05.31 |
